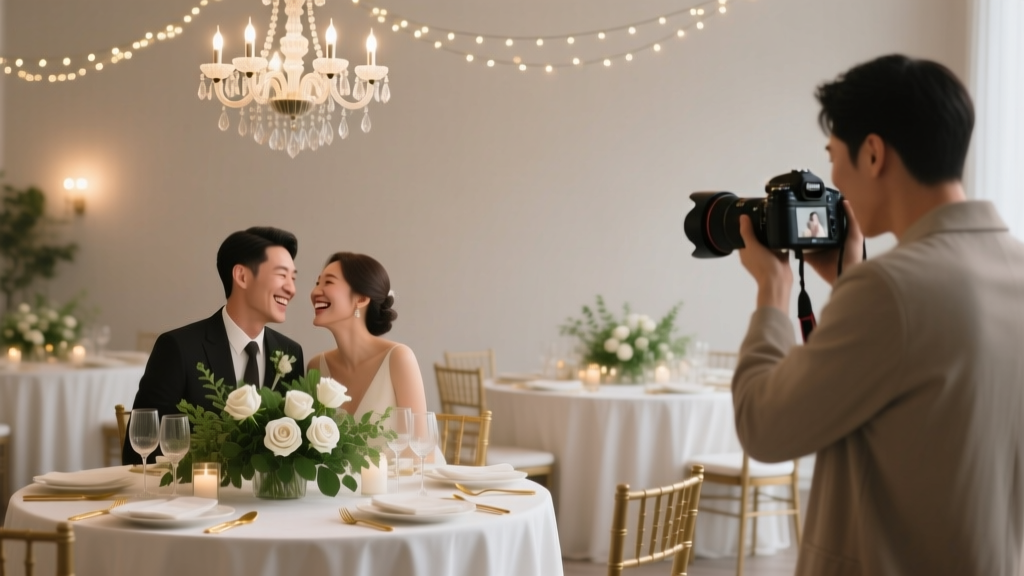
Wedding Reception Photography Tips: Plan, Coordinate, and Capture Every Moment
A wedding reception moves fast: grand entrances, toasts, first dances, family hugs, and spontaneous dance-floor moments happen in minutes—not hours. Without a clear photography plan, couples often end up with beautiful portraits but missed reception memories (or the opposite: great candids but no must-have family shots). Proper planning turns reception photography from a “hope we got it” situation into a reliable, organized part of your event coordination.
Reception photography is also one of the few wedding investments that keeps paying dividends long after the last song. The right coverage preserves the atmosphere your planning created—your décor, lighting, menu choices, seating design, and entertainment. When you align your photography plan with your reception timeline, vendor team, and budget, you’ll get a gallery that feels complete: polished highlights plus genuine, in-between moments.
This guide breaks down practical wedding reception photography tips with step-by-step timelines, checklists, budget considerations, and real-world examples—so your event planning feels confident, coordinated, and inspired.
What Makes Wedding Reception Photography Unique (and Tricky)
Receptions are low light, fast paced, and unpredictable
Most receptions include dim lighting, moving subjects, and mixed color temperatures (candles + DJ lights + uplighting). That’s a technical challenge and an organizational challenge. You’ll get better results when you plan:
- Lighting strategy: uplights, candles, string lights, and spotlighting for key moments
- Timeline breathing room: buffers for transitions and crowd movement
- Access: clear lanes for your photographer to move and shoot
- Communication: quick cues between planner/coordinator, DJ/MC, and photo team
Reception photos tell the “party story”
Portraits show how you looked; reception photos show how it felt. A great reception gallery typically includes:
- Room reveal and detail shots (before guests enter)
- Key people and candid interactions (guest experience)
- Formal events (entrances, dances, toasts, cake, traditions)
- High-energy dance photos
- Nighttime couple portraits (if desired)
- Exit moment (sparkler exit, confetti, vintage car departure)
Pre-Reception Planning: Set Your Photo Priorities
Create a “Reception Shot List” that’s realistic
A strong shot list is specific but not overly long. Aim for 25–40 reception priorities, not 150. Organize it by timing so it’s easy to execute.
Sample reception shot list categories:
- Details: table settings, place cards, menu cards, favors, guest book, signage, sweetheart table, centerpieces, cake/dessert display, bar design
- People: each table group, couple with college friends, couple with work friends, grandparents, VIP guests
- Moments: grand entrance, first dance, parent dances, toasts reactions, cake cutting, bouquet/garter (if applicable), anniversary dance, cultural traditions
- Atmosphere: wide room shot, band/DJ action, dance floor, candid laughter, kids playing, photo booth fun
Assign a “photo wrangler” for VIP group shots
One of the best event planning strategies is to designate a wrangler—someone who knows the family dynamics and can locate people quickly. Your photographer stays focused on shooting while the wrangler gathers groups.
- Choose someone confident and friendly (not the couple)
- Share a list of names (not just “bride’s cousins”)
- Have them coordinate with your planner/coordinator and DJ/MC
Build a Reception Timeline That Photography Can Actually Follow
Recommended reception flow (example template)
Use this as a starting point, then tailor it to your venue and cultural traditions. Add 5–10 minute buffers between major events.
- Photographer arrival/room capture: 20–30 minutes before guest entry
- Guest entry + cocktail-to-reception transition: 15 minutes
- Grand entrance: 5 minutes
- First dance: 5 minutes
- Welcome + dinner service begins: 10 minutes
- Toasts: 15–25 minutes (keep it tight)
- Parent dances or special dances: 10 minutes
- Open dancing: 45–90 minutes
- Cake cutting/dessert moment: 10 minutes
- More dancing + late-night events: 30–60 minutes
- Exit / final photo moment: 10 minutes
Golden rule: schedule the “must-photograph” moments early
Guest energy peaks and dips naturally. Also, older relatives may leave early. If you want key people captured, prioritize:
- Toasts earlier in the night
- Parent dances before open dancing
- Table touches (couple visiting tables) early—then let the party happen
Lighting and Room Setup Tips That Improve Photos Dramatically
Plan lighting with your photographer and DJ/venue
Current wedding reception trends lean into mood lighting—candles, warm uplighting, and statement installations. These look incredible in person, but can be challenging on camera without a plan.
- Add uplighting: warms walls, adds depth, and elevates wide shots
- Use a spotlight for key moments: first dance, speeches, cake cutting
- Avoid harsh overhead fluorescents: ask your venue what can be dimmed
- Mind DJ dance lights: fun for dancing, but consider limiting intense laser effects during first dance and toasts
Design your “photo zones”
Think like an event coordinator: create clear spaces for moments to happen and be photographed.
- Toast location: position speakers with flattering light and a clean background
- Dance floor placement: keep it near the couple’s table for stronger storytelling
- Photo booth/backdrop: avoid placing it in a dark corner; add consistent lighting
- Cake/dessert table: keep it away from clutter (bus tubs, service doors)
Step-by-Step Planning Timeline and Checklists
6–9 months before: foundation and vendor alignment
- Book your wedding photographer (and second shooter if needed)
- Confirm style: documentary, editorial, classic, flash-heavy party photos
- Ask about reception lighting approach (on-camera flash, off-camera flash, natural light)
- Share venue details and approximate reception schedule
- Start a “must-have moments” list (keep it short and meaningful)
3–5 months before: build the plan
- Create a draft reception timeline with your planner/coordinator and DJ/MC
- Decide on special events: anniversary dance, late-night snacks, outfit change, champagne tower
- Plan room layout (seating chart, head table style, dance floor, band/DJ location)
- Choose lighting upgrades if needed (uplighting, pin spots, spotlight)
- Identify your photo wrangler and confirm they’re willing
4–6 weeks before: finalize details
- Finalize shot list categories: details, people, moments, atmosphere
- Send a list of VIP names and relationships to photographer/coordinator
- Confirm start/end times, number of photographers, and coverage hours
- Review venue photo rules (flash restrictions, balcony access, outdoor limitations)
- Confirm vendor meal timing (so the photo team doesn’t miss key moments)
1 week before: lock the execution plan
- Distribute the final timeline to all vendors (photographer, DJ/MC, catering, venue, planner)
- Confirm the “room reveal” time when the space is 100% ready
- Prepare a detail box for photos (invites, rings, vow books, heirlooms)
- Confirm how cues will work (DJ announces, coordinator signals photographer)
Day-of checklist: reception photography success
- Room ready 20–30 minutes before guest entry for detail shots
- Microphone tested for toasts (clear audio also helps photo timing)
- Speakers know where to stand and when to begin
- Couple informed of “photo moments” (where to stand for cake cutting, dances)
- Vendor meals scheduled during a natural lull
- Exit props ready (sparklers, confetti, glow sticks) with a safety plan
Budget Considerations: What Reception Coverage Really Costs
Where your photography budget goes
Reception photography costs vary by region and experience, but these factors drive pricing:
- Hours of coverage (common: 8–10 hours total wedding day)
- Second photographer (better dance-floor coverage and more candids)
- Lighting gear (off-camera flash setups often require expertise and assistants)
- Editing time (reception images take longer due to low light)
Sample budget breakdown (customize to your priorities)
If your total wedding budget is $30,000, a common planning range for photography is 10–15% ($3,000–$4,500). Here’s a practical way to allocate for reception-focused results:
- Base photography package: 70–85%
- Second shooter add-on: 10–20%
- Extra hour of coverage: 5–10%
- Engagement session (optional): 5–10%
Money-saving tip that protects quality: Instead of cutting the second shooter, reduce coverage by one hour if your reception ends early. A second shooter often matters most during the reception when simultaneous moments happen (toasts reactions + wide room shots + candids).
How to Choose the Right Reception Photographer (and Team)
What to ask during vendor selection
- Can we see 2–3 full wedding galleries, including the reception (not just highlights)?
- How do you handle low light and mixed lighting?
- Do you use off-camera flash for dance floors? If yes, what does the setup require?
- How do you coordinate with the planner and DJ/MC for timing?
- What’s your approach to candid guest photos versus posed moments?
- What happens if you’re sick or there’s an emergency (backup plan)?
Green flags in reception portfolios
- Clean skin tones in dim light (not overly orange/green)
- Crisp motion on the dance floor (no constant blur unless stylistic)
- Strong variety: wide shots, medium storytelling shots, and close emotion
- Great reactions during toasts (laughter, tears, crowd energy)
Real-World Examples: Small Changes, Big Photo Improvements
Example 1: Toasts moved earlier to capture VIPs
Couple A noticed grandparents often leave by 8:30 PM. Their coordinator shifted toasts to right after dinner service began. Result: grandparents were photographed laughing during speeches, plus the couple got meaningful family candids before anyone left.
Example 2: A spotlight transformed first dance photos
Couple B loved moody lighting, but their venue was very dark. Their planner added a single soft spotlight for the first dance and positioned it behind the photographer’s main angle. Result: dramatic images with clean lighting—without changing the vibe of the room.
Example 3: Cake table repositioned for a cleaner background
Couple C originally placed the cake near the kitchen doors for convenience. Their photographer flagged the clutter risk. The coordinator moved it to a corner with uplighting and florals. Result: cake-cutting photos looked editorial and polished.
Common Wedding Reception Photography Planning Mistakes to Avoid
- Overpacking the timeline: No buffers leads to rushed toasts, missed events, and stress on the vendor team.
- Skipping the room-reveal window: Detail photos require a finished room without guests or staff setting plates.
- Not telling the DJ/MC the photo plan: Announcements without warning can cause the photographer to miss key moments.
- Dim lighting with no strategy: Mood is great; pitch-black isn’t. Plan uplighting or spotlighting for key events.
- No wrangler for group shots: Ten minutes turns into thirty, and the couple loses party time.
- Assuming “we’ll remember later”: Put priorities in writing—names, relationships, and must-have moments.
FAQ: Wedding Reception Photography Tips
How many hours of photography do we need for the reception?
Many couples schedule 3–5 hours of reception coverage depending on events planned. If you want grand entrance through dancing plus an exit, plan closer to 4–5 hours.
Do we need a second photographer for the reception?
It’s highly recommended for medium to large weddings (80+ guests) or receptions with multiple areas (separate lounge, patio, photo booth). A second shooter captures reactions during toasts, wide room shots, and candids while the lead focuses on key moments.
What reception moments should we schedule first so they’re photographed well?
Toasts, parent dances, and any cultural traditions you care about most. Prioritizing them earlier helps ensure VIP guests are present and energy is focused.
How do we get great dance floor photos without blinding guests with flash?
Ask your photographer about off-camera flash placement and diffusion. It can create flattering light without constant direct flash. Also, keep dance floor lighting consistent—too many lasers or strobe-heavy effects can overwhelm photos.
Should we do table photos with every guest table?
Only if it fits your timeline. For large weddings, consider a quicker alternative: the photographer captures candid table moments during dinner, plus a short list of VIP tables.
What’s the best way to ensure décor details are photographed?
Schedule 20–30 minutes for room photos before guest entry, and ensure décor is complete: candles lit (if safe), place settings finished, signage placed, and florals delivered.
Actionable Next Steps for a Smooth, Photo-Ready Reception
- Draft your reception timeline with 5–10 minute buffers between major events.
- Create a reception shot list capped at 25–40 priorities organized by timing.
- Choose a photo wrangler and share VIP names and relationships.
- Review lighting with your photographer, venue, and DJ—especially for toasts and first dance.
- Confirm vendor coordination: who cues events, where speakers stand, and when meals happen.
When your photography plan is built into your event planning workflow—timeline, vendor communication, lighting, and layout—you’ll walk away with a wedding reception gallery that feels complete, energetic, and true to your celebration.
Explore more planning checklists, party organization tips, and vendor coordination guides at smartpartyprep.com.
More Articles
 What Is Grad Party? The Truth No One Tells You (It’s Not Just Cake & Caps — Here’s How to Plan One That Actually Feels Meaningful, Saves $327 on Average, and Avoids 5 Common Pitfalls That Derail 68% of Celebrations)
 How to Create a Private Party Invite on Facebook (Without Accidentally Going Public): A Step-by-Step Guide That Actually Keeps Your Guest List Secure and Stress-Free
 How Do I Endorse a Check to a Third Party Safely? 5 Critical Steps You’re Missing (That Could Void Your Payment or Trigger Fraud Flags)
What the Bible Says About Partying: 7 Biblical Boundaries Every Christian Host Needs (Before You Send the Invite)
What to Wear on a Christmas Party at Work: The 7-Second Dress Code Decoder (No More Awkward Outfits or Last-Minute Panic)
How Do You Party Without Stress, Overspending, or Awkward Silences? The Real-World Event Planner’s 7-Step Framework for Memorable, Inclusive, Low-Effort Celebrations That Actually Feel Fun (Not Forced)
How Do I Endorse a Check to a Third Party Safely? 5 Critical Steps You’re Missing (That Could Void Your Payment or Trigger Fraud Flags)
What the Bible Says About Partying: 7 Biblical Boundaries Every Christian Host Needs (Before You Send the Invite)
What to Wear on a Christmas Party at Work: The 7-Second Dress Code Decoder (No More Awkward Outfits or Last-Minute Panic)
How Do You Party Without Stress, Overspending, or Awkward Silences? The Real-World Event Planner’s 7-Step Framework for Memorable, Inclusive, Low-Effort Celebrations That Actually Feel Fun (Not Forced)
 Why You Can’t Actually Enable Third-Party Cookies on iPhone in 2024 (And What to Do Instead When Your Login, Analytics, or Ad Tracking Breaks)
How Much Is a Party Box at Taco Bell in 2024? We Ordered 3 Sizes, Compared Real Costs, Portion Accuracy, and Hidden Fees—Here’s Exactly What You’ll Pay (and Whether It’s Worth It)
Is Primal Queen 3rd Party Tested? We Investigated Lab Reports, Certifications & Red Flags So You Don’t Risk Your Event’s Wellness Credibility — Here’s What the Data *Actually* Shows
Why You Can’t Actually Enable Third-Party Cookies on iPhone in 2024 (And What to Do Instead When Your Login, Analytics, or Ad Tracking Breaks)
How Much Is a Party Box at Taco Bell in 2024? We Ordered 3 Sizes, Compared Real Costs, Portion Accuracy, and Hidden Fees—Here’s Exactly What You’ll Pay (and Whether It’s Worth It)
Is Primal Queen 3rd Party Tested? We Investigated Lab Reports, Certifications & Red Flags So You Don’t Risk Your Event’s Wellness Credibility — Here’s What the Data *Actually* Shows
 Can You Actually Cash a Third Party Check on Chime? The Truth About Endorsements, Limits, Holds, and Why Most Attempts Get Rejected (Plus What Works in 2024)