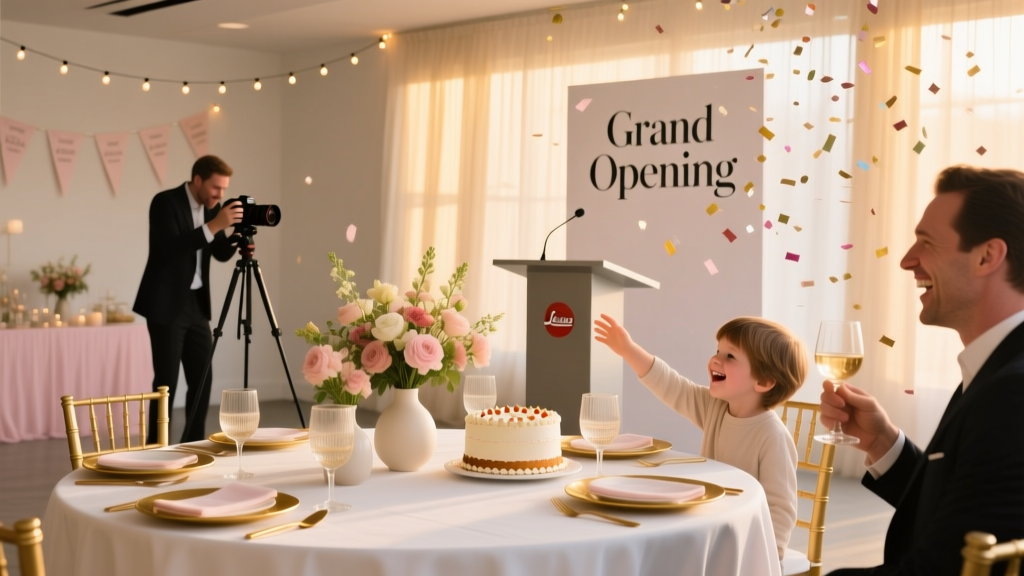
Grand Opening Photography Tips: Capture the Moment and Market Your Business
A grand opening is more than a ribbon cutting—it’s a brand-defining moment. The photos you capture that day become your first wave of marketing assets: website banners, social media posts, press kits, investor updates, and “look how it started” storytelling for years to come. When photography is planned like any other vendor category (catering, entertainment, rentals), the event runs smoother and your images look intentional instead of accidental.
Good grand opening photography doesn’t happen by luck. It comes from clear priorities, a simple shot list, smart lighting choices, and tight coordination with your event planning timeline. The goal is to document both energy and credibility: a welcoming space, engaged guests, key partners, and authentic moments that prove your business is open and ready.
This guide walks you through practical, step-by-step grand opening photography tips—from choosing a photographer and building a timeline to budgeting, avoiding common mistakes, and ensuring you leave the day with a complete set of images you can immediately use.
What Great Grand Opening Photos Need to Do
Before you book a photographer or set up a photo area, define what “success” looks like. A strong grand opening photo gallery should support both event planning goals (guest experience, sponsor visibility) and business goals (brand recognition, customer trust, press coverage).
Core photo outcomes to plan for
- Brand story: Exterior signage, storefront, logo moments, branded details, packaging, uniforms.
- Proof of popularity: A lively crowd, lines (if appropriate), people interacting, full rooms.
- Community & partnerships: Sponsors, local officials, collaborators, vendors, team members.
- Milestone moments: Ribbon cutting, speeches, first purchase, giveaways, announcements.
- Marketing assets: Social-friendly vertical images, wide hero images for the website, detail shots for ads.
Trend-aware tip: Build content for multiple channels
Current event planning trends favor “content-first” planning—creating assets that work across Instagram Reels, Stories, Google Business Profile, press releases, email campaigns, and your homepage. Ask your photographer (or content creator) to deliver a mix of:
- Horizontal hero images (website headers, PR)
- Vertical images (Stories, TikTok/IG, Pinterest)
- Short clips (5–10 seconds) of key moments if video add-on is available
- Detail shots (products, food, signage) for ads and posts
Pre-Event Planning: Set Your Photography Strategy
1) Decide your coverage style
Grand opening photography typically falls into one (or a blend) of these styles:
- Documentary/candid: Real moments and guest interactions (great for authenticity).
- Brand/editorial: Polished, curated shots of your space and products (great for marketing).
- PR/event coverage: Captures VIPs, speeches, ribbon cutting, sponsor signage (great for media).
2) Create a simple shot list (with “must-have” priorities)
A shot list prevents missed moments and helps photographers plan lighting and movement. Keep it short and realistic—your photographer can capture candid extras.
Must-have shot list template:
- Exterior wide shot showing location and signage
- Close-ups: logo, branded décor, featured products/services
- Venue overview (wide angles) before guests arrive
- Staff/team group photo + candid working shots
- VIP arrivals and greetings (if applicable)
- Ribbon cutting: hands on ribbon, scissors, reaction shot, crowd behind
- Speech moments: speaker + audience reaction
- Guest experience: browsing, sampling, conversations
- Sponsor/partner visibility: step-and-repeat, signage, booth interactions
- Closing “success” photo: crowded room or team celebration
Pro coordination tip: Assign one point person (event coordinator, manager, or trusted team member) to help gather VIPs and organize group shots so the photographer doesn’t chase people.
3) Plan lighting early (it affects everything)
Lighting can make a beautiful grand opening look dull—or a modest space look high-end. During event planning, identify what type of light you’ll have:
- Daylight: Ideal for clean, bright photos; plan key moments near windows or outdoors.
- Mixed lighting: Common in storefronts (overhead fluorescents + daylight); can cause odd color casts.
- Night event: Requires more intentional lighting (uplights, LED panels, flash).
Quick fixes that dramatically improve photos:
- Replace mismatched bulbs so color temperature is consistent
- Add uplighting to walls for depth (popular trend for modern event styling)
- Avoid harsh overhead-only lighting; add lamps or soft LED panels near photo areas
- Use matte signage when possible (glossy surfaces reflect flash)
Vendor Selection Tips: Hiring the Right Photographer
What to look for (beyond pretty pictures)
When choosing a photographer for a grand opening event, prioritize reliability and event experience. Ask for full galleries from similar events—not just highlights.
- Event experience: They should handle fast schedules and mixed lighting.
- Consistency: Photos should look cohesive across the whole gallery.
- People + branding skills: Great portraits plus strong detail/product shots.
- Delivery speed: Grand opening content is time-sensitive for PR and social posts.
- Professional workflow: Contract, insurance, backup gear, clear timeline.
Questions to ask before booking
- How many grand openings or corporate events have you photographed?
- What’s your turnaround time for a sneak peek and full gallery?
- Do you bring backup cameras, lenses, and lighting?
- Can you provide a mix of horizontal and vertical images?
- What are your usage rights—can we use images for ads and PR?
- Do you offer a second shooter for larger crowds?
Real-world example: right-sizing coverage
A boutique fitness studio expecting 80–120 guests booked a photographer for 3 hours. They scheduled the ribbon cutting at the 60-minute mark, planned a 15-minute “VIP window,” and created a branded photo wall near the entry. Result: clean, well-lit photos of arrivals, crowd energy, key partners, and content for a month of social posts—all without paying for unnecessary all-day coverage.
Step-by-Step Grand Opening Photography Timeline (with Checklist)
Use this planning timeline as a template. Adjust based on your guest count, venue size, and whether you need PR coverage.
6–8 weeks before
- Define goals: PR coverage, social content, sponsor visibility, team photos
- Set a preliminary event schedule (arrivals, speeches, ribbon cutting, activations)
- Research photographers and request quotes
- Confirm any venue restrictions (flash rules, space limitations, permits)
4–6 weeks before
- Book photographer and sign contract
- Share brand guidelines (logo usage, preferred angles of products, vibe references)
- Draft your shot list and identify VIPs/partners
- Plan event design with photography in mind (signage placement, clutter control)
2–3 weeks before
- Do a walk-through at the same time of day as the event (check lighting)
- Confirm key moments: ribbon cutting time, speeches, special announcements
- Decide on photo-friendly zones:
- Entry “moment” (sign, balloons, florals)
- Branded backdrop or step-and-repeat
- Product/service demo area
- Create a list of “must photograph” people (with names and roles)
1 week before
- Finalize event timeline and send to photographer + key vendors
- Confirm access: parking, load-in instructions, contact person on site
- Prepare signage checklist:
- Logo sign clean and level
- Hours/website/social handles visible
- Sponsor signage placed in high-traffic area
- Plan a “reset kit” for quick fixes: lint roller, wipes, tape, scissors, extra bulbs
Day-of (run-of-show photography checklist)
- 30–60 minutes pre-guest: Space photos, detail shots, team prep candids
- Guest arrival window: Greetings, sign-in, branded moments, crowd building
- Peak energy: Full room shots, interactions, product demos, sampling
- Main moment: Ribbon cutting/speech (confirm exact time)
- VIP/group photos: Schedule a 10-minute block immediately after ribbon cutting
- Closing: Team photo, final crowd shot, “thank you” signage
Budget Considerations: What to Expect and Where to Spend
Photography pricing varies by region and experience, but the budgeting approach is consistent: pay for reliability, deliverables, and speed when grand opening marketing is time-sensitive.
Typical cost factors
- Hours of coverage (often 2–5 hours for grand openings)
- Second shooter (recommended for 150+ guests or multiple areas)
- Rush delivery / next-day sneak peeks
- Editing level and number of final images
- Usage rights for paid ads and PR
- Travel fees and parking
Sample budget breakdown (adjust to your market)
- Photography coverage (3 hours): 45–60% of photo budget
- Second shooter (optional): 15–25%
- Lighting add-ons (uplights/LED panels): 10–20%
- Backdrop/step-and-repeat + stand: 10–15%
- Rush sneak peeks (optional): 5–10%
Smart spending tip: If budget is tight, reduce coverage hours but protect the “must-have” moments by scheduling them close together (arrivals + ribbon cutting + VIP photos within a 90-minute window).
On-Site Photography Tips That Make a Big Difference
Set up a photo-friendly layout (reduce clutter)
- Clear counters of extra boxes, bags, paperwork, and personal items
- Hide cords with tape or cord covers (also improves safety)
- Use purposeful “vignettes” (small styled areas) rather than decorating everything
Make signage readable in photos
- Place the logo sign at eye level in a high-traffic area
- Angle signs slightly to reduce glare
- Use larger fonts than you think you need—photos shrink on social media
Plan crowd shots intentionally
Empty rooms can happen even at successful events—guests tend to cluster. To capture “buzz”:
- Schedule the ribbon cutting when you expect peak attendance
- Ask your emcee to invite guests closer for the main moment
- Use one central activation (giveaway table, tasting, demo) to concentrate energy
Coordinate key people for portraits
- Create a short “VIP list” with names and quick identifiers
- Assign a wrangler (someone who knows the VIPs) to pull people efficiently
- Keep group photos to 2–3 minutes each; do more candids instead
Consider a hybrid content plan (trend)
Many brands now hire both a photographer and a content creator for quick phone-friendly clips. If you do this, define roles:
- Photographer: key moments, polished marketing images, group shots
- Content creator: behind-the-scenes, vertical video, quick interviews, story posts
Common Grand Opening Photography Planning Mistakes to Avoid
- No shot list or priorities: Leads to missed ribbon cuttings or sponsor photos.
- Scheduling the “big moment” too early: Guests arrive late; photos look sparse.
- Ignoring lighting: Mixed bulbs and harsh overheads make images look unprofessional.
- Not planning a VIP wrangler: Group photos turn into time-consuming searches.
- Cluttered backgrounds: Boxes, open doors, and random signage distract from your brand.
- Unclear image rights: You want permission for web, PR, and paid advertising in writing.
- Waiting too long to post: Grand opening excitement fades quickly—plan for fast sneak peeks.
FAQ: Grand Opening Photography Tips
How many hours of photography coverage do we need for a grand opening?
Most small-to-mid grand openings do well with 2–4 hours. If you have multiple program segments (media hour, VIP reception, public opening), consider 4–6 hours or split coverage blocks.
When should we schedule the ribbon cutting for the best photos?
Aim for 45–90 minutes after doors open, when the crowd has built. Confirm the exact time on your event timeline and announce it clearly so guests gather.
Do we need a step-and-repeat backdrop?
Not always, but a simple branded backdrop helps you capture clean partner photos and makes sponsor visibility easier. A well-lit “photo moment” near the entrance can be just as effective.
What should we send the photographer before the event?
Send the final timeline, shot list, VIP list, venue address/parking instructions, and brand notes (logo placement, must-show products, key sponsor signage).
How fast should we post photos after a grand opening?
Post within 24–72 hours while excitement is high. Many teams request 10–20 sneak peek images the next day for social media and press outreach.
What if our space is small—can we still get great photos?
Yes. Focus on tighter compositions, one strong branded zone, controlled lighting, and strategic crowd shots. Small spaces often photograph well when clutter is minimized and the guest flow is managed.
Actionable Next Steps: Your Grand Opening Photo Plan
- Define your top 10 “must-have” photos (branding, crowd, key people, milestone moment).
- Build your event planning timeline around a peak-energy main moment (often the ribbon cutting).
- Book a photographer with event experience and confirm usage rights for marketing.
- Walk the venue for lighting and choose 2–3 photo-friendly zones.
- Create a day-of checklist and assign a VIP wrangler to keep photos moving.
- Plan for fast posting by requesting sneak peeks and prepping captions/hashtags in advance.
Strong grand opening photography is one of the easiest ways to extend the value of your event—turning a single day into weeks of marketing content and long-term brand credibility. For more timelines, checklists, and party organization strategies, explore additional event planning guides on smartpartyprep.com.
More Articles
 What Does the Party Do in Roblox? 7 Actionable Steps to Plan, Launch, and Grow Your Virtual Event (Without Getting Banned or Boring Anyone)
 How Much to Rent a Party Bus in 2024: The Real Cost Breakdown (Spoiler: It’s Not Just Hourly Rates—Hidden Fees, Group Size, and Seasonal Surges Can Double Your Quote)
How to Throw a Killer Party Without Burning Out: The 7-Step Stress-Free Framework That 92% of Hosts Skip (But Pros Swear By)
How Much to Rent a Party Bus in 2024: The Real Cost Breakdown (Spoiler: It’s Not Just Hourly Rates—Hidden Fees, Group Size, and Seasonal Surges Can Double Your Quote)
How to Throw a Killer Party Without Burning Out: The 7-Step Stress-Free Framework That 92% of Hosts Skip (But Pros Swear By)
 Which Party Gerrymanders More? The Truth Behind the Maps: New 2024 Data Shows Neither Side Has Clean Hands — Here’s Exactly Where & How Each Manipulates Districts (With Interactive Maps & Court Rulings)
 How to Allow Third Party Cookies on Mac: The Exact Safari & Chrome Steps You’re Missing (2024 Verified Guide That Actually Works)
How to Display Cookies at a Party Like a Pro: 7 Foolproof, Instagram-Worthy Tactics That Prevent Crowding, Keep Cookies Fresh, and Make Guests Feel Instantly Welcome (No Fancy Tools Required)
How to Sign Over a Check to Another Party Without Getting Rejected: 5 Critical Steps Banks Won’t Tell You (But Should)
What Do Both Political Parties Agree On? 7 Surprisingly Unified Priorities (Backed by Congressional Votes, Polls & Bipartisan Legislation)
How to Allow Third Party Cookies on Mac: The Exact Safari & Chrome Steps You’re Missing (2024 Verified Guide That Actually Works)
How to Display Cookies at a Party Like a Pro: 7 Foolproof, Instagram-Worthy Tactics That Prevent Crowding, Keep Cookies Fresh, and Make Guests Feel Instantly Welcome (No Fancy Tools Required)
How to Sign Over a Check to Another Party Without Getting Rejected: 5 Critical Steps Banks Won’t Tell You (But Should)
What Do Both Political Parties Agree On? 7 Surprisingly Unified Priorities (Backed by Congressional Votes, Polls & Bipartisan Legislation)
 Who Are the Biggest Donors to the Republican Party? We Analyzed FEC Data Through 2024 — Revealing the Top 12 Individuals, Families, and Super PAC Backers Driving GOP Strategy (and What Their Giving Patterns Say About 2024)
What Is a Cabi Party? The Truth Behind the Glamorous Social Selling Event (No, It’s Not Just Another Clothing Swap)
Who Are the Biggest Donors to the Republican Party? We Analyzed FEC Data Through 2024 — Revealing the Top 12 Individuals, Families, and Super PAC Backers Driving GOP Strategy (and What Their Giving Patterns Say About 2024)
What Is a Cabi Party? The Truth Behind the Glamorous Social Selling Event (No, It’s Not Just Another Clothing Swap)