Planning a Game Tournament on a Budget: Step-by-Step Event Coordination That Still Feels Premium
A game tournament is one of the easiest ways to turn a casual get-together into a high-energy event—whether you’re hosting teens, coworkers, families, or a community group. The challenge is that tournaments can get chaotic fast: mismatched schedules, unclear rules, tech hiccups, and guests who don’t know where to go next. That’s why proper event planning and coordination matters more here than it does for many parties.
With a clear structure, you can keep momentum high, reduce downtime, and make the tournament feel professionally organized without spending like a corporate production. The key is budgeting on purpose: deciding what truly impacts the guest experience (smooth play, clear communication, fair brackets, and comfortable seating) and trimming everything else.
This guide lays out a practical planning timeline, a budget breakdown, vendor selection tips, and real-world examples so you can run a fun, organized game tournament on a budget—while still delivering a polished event.
1) Start With the Right Tournament Format (Budget-Friendly by Design)
Your format drives your costs, staffing needs, time requirements, and equipment. Pick the simplest format that fits your group size and venue.
Popular budget-friendly formats
- Single elimination: Fast and simple; fewer matches and less time required. Best for larger groups on tight schedules.
- Double elimination: Players get a second chance; more matches, more time, slightly more coordination.
- Round robin (small groups): Everyone plays everyone; great for 4–6 players per group, but time adds up quickly.
- Swiss-style (for larger groups): Players keep playing even after a loss; needs basic scoring management but keeps guests engaged.
Event planning tip: match the format to your time block
- 2–3 hours: Single elimination or small round robin groups with finals
- 3–5 hours: Double elimination or Swiss-style
- All-day: Swiss-style into playoffs, or multi-game stations
Real-world example
Office “Mario Kart + Party Games” tournament (24 players, 3 hours): Run 4 groups of 6 (round robin in groups), take top 2 from each group into a single-elimination bracket. Guests play multiple rounds, and you only need one “finals” screen setup.
2) Define Your Scope: Game Type, Player Count, and Experience Level
Budget event planning gets easier when the scope is clear. Set these decisions early so you can build a realistic checklist and avoid last-minute spending.
Core planning decisions
- Game type: video games, board games, card games, tabletop, or mixed
- Player count: expected attendees vs. active competitors
- Skill level: casual, competitive, or mixed (consider beginner brackets)
- Equipment ownership: what you already have vs. what must be rented/borrowed
- Prizes: bragging rights, small trophies, gift cards, or sponsor items
Trend to use: “micro-competitions” and side quests
Current event planning trends favor flexible, drop-in activities. Add 1–2 side stations (speed puzzle, mini board game, trivia) so eliminated players stay entertained without additional major costs.
3) Budget Breakdown: What to Spend On (and Where to Save)
A tournament feels “expensive” when it runs smoothly. Prioritize organization, reliable equipment, and comfort over décor.
Sample budget tiers (30–40 guests)
$150–$300: Ultra-lean community or house tournament
- Prizes: $30–$75 (gift cards, medals, DIY certificates)
- Snacks + drinks: $60–$150 (bulk chips, popcorn, water, soda)
- Printing/signage: $10–$25
- Supplies: $20–$50 (extension cords, power strips, tape, pens)
$300–$700: Polished party tournament
- Prizes: $75–$150
- Food: $150–$350 (pizza trays, sandwich platters, DIY taco bar)
- Rentals (as needed): $50–$250 (extra tables/chairs, basic AV)
- Décor/signage: $25–$75 (simple theme, table labels, banner)
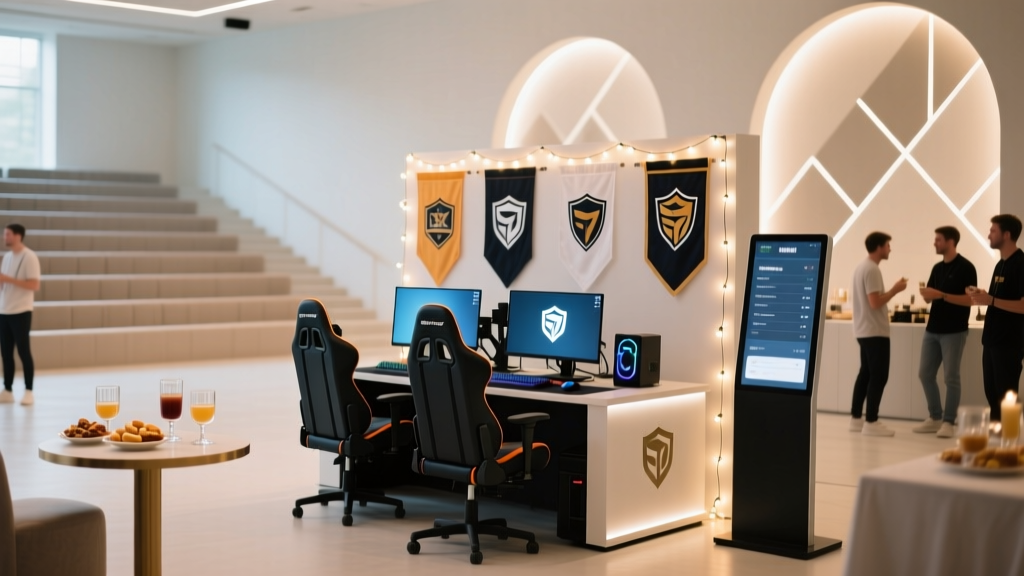
$700–$1,500: Larger venue or “mini-esports” feel
- Venue/permit: $200–$800 (community room, hall rental)
- AV/tech support: $150–$500
- Catering: $250–$800
- Prizes/swag: $100–$300
Smart savings strategies (pro coordination tricks)
- Borrow before you rent: consoles, monitors, folding tables, coolers.
- Use digital brackets: free tools plus one printed “master bracket” at check-in.
- Choose food that doesn’t slow play: handheld items reduce mess and downtime.
- Skip expensive themed décor: use clean signage, consistent labels, and a simple color palette for a premium look.
- Ask for small sponsorships: local game shop, pizza place, or café can donate gift cards or coupons in exchange for a sign on the prize table.
4) Venue and Layout: Make the Space Work Harder (Not Your Wallet)
Good layout is one of the most overlooked event planning wins. It controls noise, traffic flow, and how “official” the tournament feels.
Budget-friendly venue options
- Home garage/basement (best for smaller tournaments)
- Community center room
- Apartment clubhouse
- Library meeting room (ideal for board/card tournaments)
- School cafeteria (requires approvals/insurance in many areas)
Layout essentials
- Check-in zone: registration, rules sheet, schedule, name tags
- Main play area: clearly numbered tables/stations
- Waiting zone: chairs + side activities to reduce crowding
- Food zone: separate from play to protect equipment and cards
- Prize + photo spot: simple backdrop, winner photos add value with no added cost
5) Vendor Selection Tips (Only When You Actually Need Vendors)
Many budget tournaments require zero vendors. If you do need help, keep the vendor list short and choose partners who simplify logistics.
When to consider vendors
- Venue rental: if your home can’t fit the group
- AV rental: projectors, speakers, microphones for announcements
- Food: catering trays for larger groups
- Photography: optional, but a student photographer can be affordable
How to pick budget-friendly vendors
- Get 2–3 quotes: compare delivery fees, setup, and minimums.
- Ask for package pricing: “tables + chairs + delivery” often beats itemized rentals.
- Confirm timing: delivery windows should match your setup timeline.
- Request a single point of contact: reduces day-of confusion.
- Watch hidden costs: overtime fees, cleaning deposits, damage waivers.
6) Step-by-Step Planning Timeline (With Checklist Items)
This event coordination timeline works for most tournaments (video games, board games, card games). Adjust the weeks based on your event size.
4–6 weeks before: Build the foundation
- Choose game(s), format, and ruleset (including tie-breakers)
- Set date, time block, and max players
- Select venue and confirm any permits/requirements
- Draft a simple budget (venue, food, prizes, supplies)
- Create registration plan (free RSVP, paid entry, or at-the-door)
- Recruit helpers (1–3 people): bracket manager, setup lead, floater
2–3 weeks before: Lock in logistics
- Confirm equipment list and what must be borrowed/rented
- Plan layout: table count, station numbers, signage needs
- Finalize prizes and order trophies/medals if using
- Food plan: pick menu, set serving time, assign food manager
- Create your “tournament packet”:
- Rules summary (1 page)
- Match reporting instructions
- Schedule overview
- Code of conduct / sportsmanship
1 week before: Confirm and communicate
- Send attendee email/text with:
- start time, check-in time, address/parking
- what to bring (controllers, chargers, decks, etc.)
- rules link and match format
- Print station numbers, brackets (backup), and signs
- Test equipment: screens, cables, controllers, internet (if needed)
- Create a day-of run of show (minute-by-minute schedule)
48–24 hours before: Prep like a pro
- Confirm headcount and build initial brackets
- Label bins: “cables,” “tape,” “markers,” “power,” “first aid”
- Buy beverages/ice and shelf-stable snacks
- Charge devices and pack spare batteries
- Prepare prize table and winner photo area
Day-of timeline template (3–4 hour tournament)
- T-90 minutes: Setup tables/stations, power, signage, check-in
- T-45 minutes: Tech test + station walkthrough
- T-30 minutes: Check-in opens, confirm players, assign stations
- Start time: Welcome + rules + schedule (5–7 minutes)
- Rounds begin: Run matches with clear reporting procedure
- Midpoint: Quick snack break (10 minutes max)
- Finals: Spotlight match (optional: project to main screen)
- Awards: Prizes + photos (10 minutes)
- Cleanup: Pack equipment, trash sweep, lost & found check
Day-of coordination checklist
- Master bracket (printed) + digital backup
- Pens/markers, tape, scissors, zip ties
- Power strips, extension cords, gaffer tape (or painter’s tape)
- Station number signs + table assignments
- Trash bags, paper towels, disinfecting wipes
- Basic first-aid kit
- Lost & found bin
- Prize list + eligibility rules (to prevent confusion)
7) Make It Feel High-End Without High Spending
Low-cost upgrades that guests notice
- Clear signage: “Check-in,” “Station 1–8,” “Match Reporting,” “Food Area”
- Name tags: add gamer tags/team names for easy networking
- Consistent schedule announcements: set a timer and announce rounds
- Simple theme: one color + one focal point (banner or backdrop)
- Music playlist: low-volume background music for energy (check venue rules)
Real-world example: Budget “premium” touch
Use a single printed “leaderboard” poster near check-in where you update top players each round. It costs a few dollars to print and makes the tournament feel official.
8) Common Planning Mistakes (and How to Avoid Them)
- Overloading the schedule: Leave buffer time for late arrivals and tech issues. Build in 10–15% slack.
- Unclear rules: Put rules in writing, including tie-breakers and what happens if someone is late.
- Too few power solutions: Underestimating outlets is a classic. Bring extra power strips and tape down cords.
- No match reporting system: Decide who reports scores and where (QR code form, bracket manager table, etc.).
- Food near equipment: Separate zones reduce spills and cleanup costs.
- Ignoring the “eliminated guest” experience: Add a side activity so everyone stays engaged.
FAQ: Game Tournament Planning on a Budget
1) How many helpers do I need to run a tournament smoothly?
For 20–40 players, plan on 2–4 helpers: one bracket manager, one floater for questions/late arrivals, and one setup/food support. If it’s a tech-heavy event, add one person dedicated to equipment troubleshooting.
2) What’s the cheapest way to handle prizes?
Use a mix of small gift cards, medals, and fun awards (Best Comeback, Most Sportsmanlike). Ask a local business for a donated prize in exchange for a sign at the prize table.
3) How do I keep matches on time?
Set a round time limit, announce transitions, and require players to check in within a set window (example: 5 minutes). Keep rules short and enforce consistent match reporting.
4) Should I charge an entry fee for a budget tournament?
If you’re providing food, prizes, or renting space, a small fee can stabilize your budget. Keep it simple: one price, clear refund policy, and disclose what the fee covers (venue, prizes, snacks).
5) What if I don’t have enough equipment for everyone to play at once?
Run staggered rounds and create a waiting zone with side games. For video game tournaments, rotating players through fewer stations is normal—just communicate the schedule clearly and avoid long gaps.
6) How far in advance should I start planning?
For a small home tournament, 2–3 weeks can work. For a community venue or larger guest list, start 4–6 weeks out to secure space, helpers, and any rentals.
Actionable Next Steps
- Pick your tournament format and lock your time block.
- Draft a lean budget that prioritizes smooth play, clear signage, and simple food.
- Create a one-page rules sheet and a match reporting process.
- Build your timeline and assign roles—bracket manager, setup lead, and floater.
- Add one low-cost “premium” touch: leaderboard poster, winner photos, or a small finals spotlight.
If you want more step-by-step event planning, party organization checklists, and coordination strategies for every type of celebration, explore more guides on smartpartyprep.com.
More Articles
 Is Kemono Party Down Right Now? Here’s How to Instantly Verify Service Status, Troubleshoot Connection Issues, and Run Your Event Without Interruption — Even If It *Is* Down
 Budget Tips for a Book Launch
 Why Is Sausage Party Rated R? The Unfiltered Breakdown Every Event Planner & Host Needs Before Booking It for Game Night, Office Parties, or College Events
 How to Throw 'A Little Party, Fergie' Without Stress: The 7-Minute Prep Framework That Turns Last-Minute Gatherings Into Unforgettable, Confident Celebrations (Yes, Even With Zero Planning Time)
How to Plan a 21st Birthday Party Without Stress or Overspending: A Realistic 6-Week Roadmap (With Free Timeline Template & Cost Tracker)
Where Are They Now Party Down South: The Shocking Truth About Where Cast Members Really Ended Up (Spoiler: Only 2 Are Still in the Industry)
How to Throw 'A Little Party, Fergie' Without Stress: The 7-Minute Prep Framework That Turns Last-Minute Gatherings Into Unforgettable, Confident Celebrations (Yes, Even With Zero Planning Time)
How to Plan a 21st Birthday Party Without Stress or Overspending: A Realistic 6-Week Roadmap (With Free Timeline Template & Cost Tracker)
Where Are They Now Party Down South: The Shocking Truth About Where Cast Members Really Ended Up (Spoiler: Only 2 Are Still in the Industry)
 What to Wear to Christmas Party Work: The Stress-Free 5-Minute Dress Code Decoder (No More Last-Minute Panic or Awkward Outfit Regrets)