Craft Fair Vendor Selection Tips: How to Build a Lineup Shoppers Love
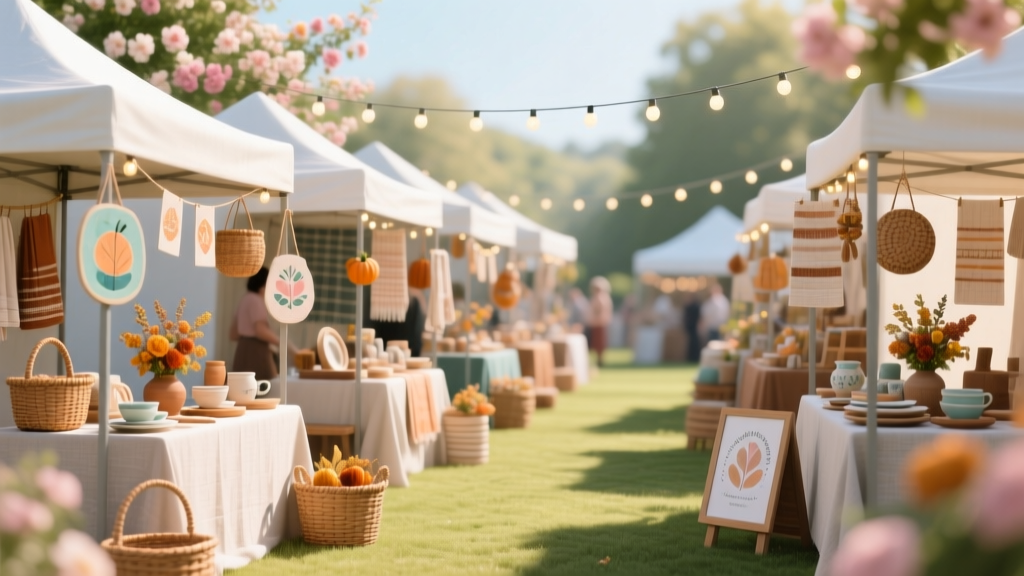
A craft fair can feel magical when everything clicks: the right mix of makers, a steady flow of shoppers, and a layout that invites people to browse longer (and buy more). That outcome rarely happens by accident. The most successful craft fairs are built on careful vendor selection, clear expectations, and a planning process that protects your budget, your brand, and your attendees’ experience.
Vendor selection is the single biggest lever you can pull to shape your event’s reputation. Strong vendors bring quality products, polished displays, and active marketing to their audiences. Poor vendor fit can lead to mismatched pricing, duplicate product categories, empty tables, and customer complaints. If you’re planning a school fundraiser, a holiday market, a community festival, or a boutique pop-up, a smart vendor strategy is what turns “tables in a room” into an organized, profitable event.
This guide walks you through step-by-step craft fair vendor selection tips, a planning timeline, budget considerations, and proven coordination strategies so you can confidently curate a vendor lineup that sells well and keeps people coming back.
Start With Your Craft Fair Vision (Before You Recruit Vendors)
Before you open applications, define what “success” looks like. This keeps your vendor selection objective and makes decision-making much faster.
Clarify the event fundamentals
- Event type: holiday market, artisan fair, makers market, fundraiser, themed pop-up
- Audience: families, gift shoppers, collectors, students, corporate employees
- Price point: budget-friendly, mid-range, premium, mixed with guardrails
- Brand promise: handmade only, curated modern, local-only, sustainable, culturally specific
- Goals: revenue (booth fees + sponsorship), foot traffic, community impact, vendor satisfaction
Real-world example: “Curated holiday gift market” vs. “community craft bazaar”
- Curated holiday gift market: You’ll prioritize cohesive aesthetics, premium packaging, and higher average transaction size. Vendor caps per category matter a lot.
- Community craft bazaar: You’ll prioritize variety, broad pricing, and community participation. You may allow more overlap and offer lower booth fees.
Vendor Selection Criteria That Create a Balanced Lineup
Use a simple scoring approach to keep your selection fair, consistent, and aligned with your event plan.
1) Product quality and craftsmanship
- Clear photos, consistent finish, and durable materials
- Professional packaging (especially for gifts)
- Compliance with safety expectations (candles, cosmetics, food items)
2) Category balance (avoid the “too many of the same thing” problem)
Shoppers want variety. Too many similar booths lowers sales across the board and frustrates vendors.
- Create category caps (example: max 3 candle vendors, max 2 crochet vendors)
- Mix “destination” categories (jewelry, home décor, apparel) with impulse categories (stickers, mini items)
- Build a gifting-friendly spread: small, medium, and high-ticket options
3) Pricing strategy and customer fit
- Ask for a sample price list or typical price range
- Confirm the vendor’s “best sellers” align with your audience budget
- Look for tiers (e.g., $8 add-ons, $25–$60 main items, $100+ statement pieces)
4) Display readiness and booth presentation
Great vendors understand that visual merchandising drives revenue. Favor vendors who demonstrate strong setup planning.
- Tablecloths, risers, clear signage, pricing visible
- Lighting plans (especially for indoor or evening events)
- Branded look that still fits your event aesthetic
5) Reliability and communication
- Responsive during the application process
- Professional tone and clear answers
- References from other markets (optional but helpful)
6) Marketing reach and collaboration mindset
Current event planning trends favor vendors who actively promote. Your event marketing gets stronger when vendors share consistently.
- Active social media presence and willingness to share event graphics
- Email list or local network participation
- Ability to create a “vendor spotlight” post (short bio + 2–3 photos)
How to Find and Recruit High-Quality Craft Fair Vendors
Where to source vendors
- Local maker groups: Facebook groups, community boards, maker collectives
- Instagram/TikTok search: location tags + keywords (e.g., “handmade earrings [city]”)
- Past events: review vendor lists and invite top performers
- Pop-ups and boutiques: ask shop owners for recommendations
- Aligned organizations: art councils, school PTO/PTA networks
Use a vendor application that does the sorting for you
Keep applications simple, but specific. A good application saves hours of follow-ups.
- Business name + contact info
- Product category (choose from a list)
- 3–6 product photos + 1 booth display photo
- Price range and best sellers
- Special requirements: electricity, corner space, food permits
- Social links and agreement to promote
- Proof of insurance (if required) or agreement to obtain it
Step-by-Step Planning Timeline (With Checklist Items)
Use this craft fair planning timeline as a template. Adjust based on event size, venue rules, and whether you’re outdoors.
12–16 weeks out: Foundation and vendor strategy
- Confirm venue, date, hours, and capacity (number of booths)
- Define your event concept, audience, and pricing expectations
- Set vendor categories and category caps
- Draft vendor terms: setup times, cancellations, payments, prohibited items
- Build your vendor application (Google Form or vendor management tool)
- Create a basic marketing plan: social schedule, email, local partners
10–12 weeks out: Open applications and begin outreach
- Publish vendor call on social media, local groups, and partner lists
- Directly invite “anchor vendors” (high-quality, strong draw)
- Set application deadline (typically 2–3 weeks)
- Prepare a waitlist process
8–10 weeks out: Select vendors and collect payments
- Score applicants using your criteria (quality, fit, variety, reliability)
- Send acceptances with payment deadline (7–10 days works well)
- Send waitlist notices and timeline expectations
- Collect booth fees and signed vendor agreements
- Request any permits/insurance documentation if required
6–8 weeks out: Layout planning and logistics
- Create a draft floor plan (aisle width, exits, accessible pathways)
- Assign booths based on needs: electricity, corner requests, large displays
- Order rentals: tables, chairs, pipe-and-drape, trash bins
- Plan check-in flow and vendor parking/loading zones
- Coordinate with venue on fire codes and occupancy limits
4–6 weeks out: Marketing push + vendor coordination
- Release vendor list (weekly spotlights increase engagement)
- Provide vendors with a promo kit: graphics, captions, event link
- Confirm entertainment or add-ons (photos, kids’ activity table, raffle)
- Finalize signage plan: entrance banner, directional signs, category markers
2–3 weeks out: Final confirmations
- Send vendor packet: arrival time, setup rules, booth number, map
- Confirm power access and extension cord expectations
- Prepare volunteer assignments and a run-of-show schedule
- Plan payment options for entry (if applicable) and day-of cash handling
Event week: Execution checklist
- Print check-in list, vendor maps, emergency contacts
- Pack supplies: tape, zip ties, scissors, pens, signage, first aid kit
- Confirm trash/recycling plan and end-of-day breakdown timing
- Prepare a “vendor support” station for quick problem-solving
Day-of quick checklist
- Vendor check-in opens on time; booths labeled clearly
- Aisles remain clear and ADA-friendly
- Music volume appropriate for shopping and conversation
- Announce raffles or specials without disrupting browsing
- Capture photos/video for next year’s marketing
Budget Considerations: What to Charge and What to Plan For
Craft fair budgets vary widely, but a simple breakdown helps you set realistic booth fees and avoid surprise costs.
Common craft fair expenses
- Venue rental: hourly or flat rate
- Tables/chairs rentals: if venue doesn’t provide
- Insurance and permits: venue requirements, food permits
- Marketing: flyers, local ads, boosted social posts, banners
- Signage and printing: maps, labels, directional signs
- Staffing/volunteers: shirts, meals, thank-you gifts
- Decor and guest experience: lights, photo moment, kids’ corner
- Payment processing: ticketing fees, card reader fees
- Contingency: 10–15% buffer
Sample budget breakdown (mid-size indoor craft fair)
Scenario: 40 vendors, 1-day event, community venue.
- Venue rental: $1,200
- Tables/chairs: $600
- Insurance/permits: $300
- Marketing + signage: $500
- Decor/guest experience: $250
- Contingency (10%): $285
- Total estimated cost: $3,135
Booth fee math example: $3,135 / 40 vendors = $78.38 per vendor (break-even). If you want a surplus for fundraising or future upgrades, you might charge $90–$110 depending on demand and what’s included.
What to include in booth fees (and what to charge extra for)
- Include: booth space, one table + two chairs (if available), basic marketing listing
- Add-ons: electricity, corner booths, extra tables, premium placement near entrance
Vendor Selection Tips That Improve Sales and Reduce Headaches
Build your vendor mix like a retail assortment
- Choose 1–2 “anchor vendors” who draw crowds (popular local brands)
- Balance high-volume items (candles, jewelry) with unique categories (woodwork, ceramics, fiber art)
- Include a few “giftable consumables” if allowed (packaged snacks, honey, tea) for easy impulse buys
Use a waitlist strategically
- Keep 10–20% of applicants on a waitlist if you have strong interest
- Fill gaps by category: if a soap vendor drops, replace with similar price point but not identical products
- Communicate clearly: waitlist timeline, how spots open, payment window
Create simple, clear vendor rules that protect the event
- No early breakdown (it hurts shopper confidence and neighbor sales)
- Setup and vehicle unloading rules (avoid congestion)
- Prohibited items list (resale/imported items if your fair is handmade-only)
- Noise rules (no amplified sales pitches, keep music reasonable)
Trend-focused tip: encourage modern payment options
Shoppers expect tap-to-pay and QR codes. Ask vendors to bring card readers, and consider offering a limited number of backup readers or a market “cash-to-card” support option if feasible.
Common Craft Fair Planning Mistakes to Avoid
- Overbooking the same category: too many similar vendors reduces sales and increases complaints.
- Accepting vendors without reviewing display photos: messy booths lower the perceived quality of the whole market.
- Unclear communication about what’s included: vendors arrive expecting tables, power, or extra space you didn’t promise.
- Ignoring traffic flow: tight aisles, blocked exits, and poor layout lead to crowding and shorter shopping time.
- Weak load-in plan: if vendors can’t unload smoothly, you’ll start the day stressed and behind schedule.
- No contingency budget: last-minute printing, extra trash removal, or a rental replacement adds up fast.
FAQ: Craft Fair Vendor Selection and Planning
How many vendors should a craft fair have?
It depends on venue size, parking, and expected attendance. For a comfortable shopping experience, plan wide aisles and enough space for browsing. As a starting point, many indoor community events land in the 25–60 vendor range, then expand once layout and attendance are proven.
How do I price booth fees fairly?
Calculate your total event cost, divide by the number of vendor spaces (break-even), then adjust based on demand, amenities included (tables, chairs, marketing), and fundraising goals. Keep fees aligned with your audience’s buying power so vendors can still profit.
Should I allow direct sales (MLM) vendors?
If your brand promise is handmade or artisan-made, allowing MLM/direct sales can create vendor and shopper frustration. If you do allow them, cap the number and separate categories clearly so the event still feels curated.
What’s the best way to prevent no-shows or late cancellations?
Use a signed vendor agreement, collect payments by a firm deadline, and set a clear cancellation policy (for example: partial refund before a certain date, no refund after). Maintain a waitlist to backfill quickly.
Do vendors need insurance?
Many venues require vendors to carry liability insurance, especially for food, candles, body products, or high-traffic indoor locations. If the venue doesn’t require it, you can still recommend it as a best practice and clarify responsibilities in your vendor agreement.
How do I keep the event feeling “curated” without being unfair?
Publish your selection criteria upfront: category caps, product standards, and photo requirements. A simple scoring rubric keeps decisions consistent and helps you communicate professionally if someone asks why they weren’t selected.
Next Steps: Turn These Tips Into Your Vendor Plan
To move from ideas to action, start with three concrete tasks:
- Write your vendor categories and caps (this instantly reduces confusion and strengthens your event brand).
- Build your application and scoring rubric so selection is fast, fair, and repeatable.
- Create your vendor timeline email sequence (acceptance message, payment reminder, vendor packet, final confirmation).
A craft fair becomes memorable when the vendor lineup is intentional, the logistics are organized, and the shopping experience feels easy. For more practical event planning, party organization, and coordination strategies—plus templates you can reuse—explore the latest guides on smartpartyprep.com.
Smart Party Prep Team
More Articles
 Do You Party Meaning Grindr? What the App’s Real Social Function Is (and Why Assuming It’s for Parties Could Backfire)
What to Wear to Graduation Party Men: The 7-Second Dress Code Decoder (No More Awkward Outfits, Sweat, or Last-Minute Panic)
Do You Party Meaning Grindr? What the App’s Real Social Function Is (and Why Assuming It’s for Parties Could Backfire)
What to Wear to Graduation Party Men: The 7-Second Dress Code Decoder (No More Awkward Outfits, Sweat, or Last-Minute Panic)
 How to Allow Third Party Cookies on iPhone in 2024: The Truth About Safari Restrictions, App Tracking, and Why Most People Are Doing It Wrong (Step-by-Step Fix)
Do Dads Go to Bachelor Parties? The Truth About Modern Guest Lists, Etiquette Shifts, and How to Include (or Exclude) Parents Without Awkwardness or Regret
Who Survived in the Donner Party? The Shocking Truth Behind the 48 Who Lived — And Why 35 Died Waiting for Rescue That Came Too Late
What Political Party Is Red? The Truth Behind America’s Color-Coded Politics (And Why Your Campaign Design Depends on Getting This Right)
Where Can You Throw a Party? 12 Unexpected, Budget-Friendly, and Permit-Free Venues (Plus Real Cost Breakdowns & Hidden Pitfalls to Avoid)
Where to Celebrate 1 Year Old Birthday Party: 7 Stress-Free, Baby-Safe Venues (That Won’t Break the Bank or Your Sanity)
Does the Bull Moose Party Still Exist? The Surprising Truth About Teddy Roosevelt’s 1912 Third-Party Movement — And Why Modern Campaigners, Educators, and Event Planners Still Reference It Today
How to Allow Third Party Cookies on iPhone in 2024: The Truth About Safari Restrictions, App Tracking, and Why Most People Are Doing It Wrong (Step-by-Step Fix)
Do Dads Go to Bachelor Parties? The Truth About Modern Guest Lists, Etiquette Shifts, and How to Include (or Exclude) Parents Without Awkwardness or Regret
Who Survived in the Donner Party? The Shocking Truth Behind the 48 Who Lived — And Why 35 Died Waiting for Rescue That Came Too Late
What Political Party Is Red? The Truth Behind America’s Color-Coded Politics (And Why Your Campaign Design Depends on Getting This Right)
Where Can You Throw a Party? 12 Unexpected, Budget-Friendly, and Permit-Free Venues (Plus Real Cost Breakdowns & Hidden Pitfalls to Avoid)
Where to Celebrate 1 Year Old Birthday Party: 7 Stress-Free, Baby-Safe Venues (That Won’t Break the Bank or Your Sanity)
Does the Bull Moose Party Still Exist? The Surprising Truth About Teddy Roosevelt’s 1912 Third-Party Movement — And Why Modern Campaigners, Educators, and Event Planners Still Reference It Today
 Was There a Party Switch? How to Pivot Your Event Seamlessly—Without Losing Guests, Budget, or Sanity (A 7-Step Crisis-to-Celebration Framework)