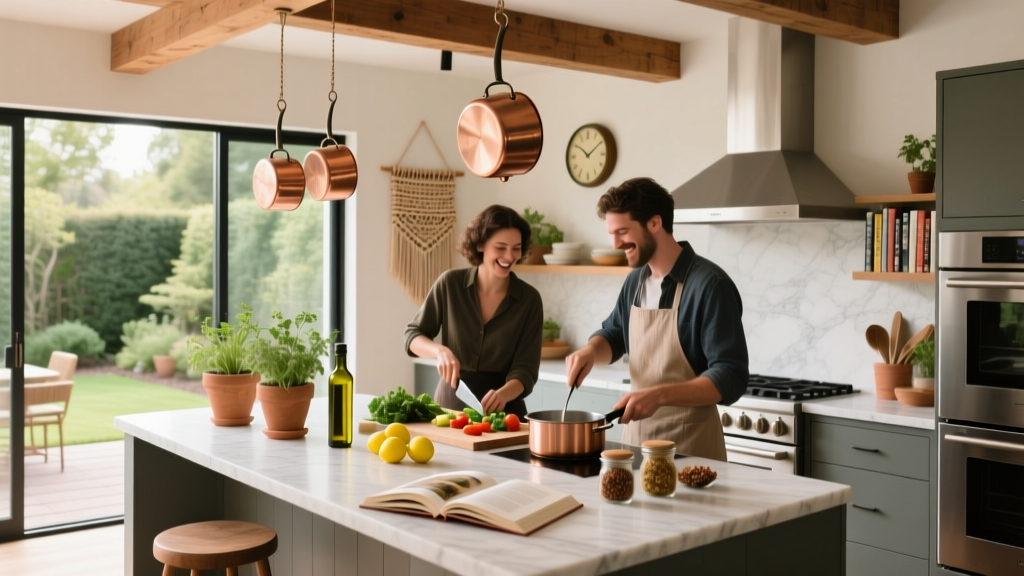
Cooking Class Venue Ideas: How to Choose the Perfect Space (and Plan the Event Like a Pro)
A cooking class event is one of the most engaging formats for celebrations, corporate team building, client appreciation, birthdays, showers, and even fundraiser nights. Guests don’t just attend—they participate, collaborate, learn a skill, and leave with a shared experience (and usually something delicious). That makes cooking classes memorable, but it also makes them more complex to plan than a typical cocktail party or seated dinner.
The right venue is the difference between a smooth, social, photo-worthy event and an evening derailed by poor ventilation, cramped prep space, or missing equipment. Proper planning also protects your budget: a venue that looks affordable at first can become expensive when you add rentals, staffing, permits, or last-minute upgrades.
This guide walks you through practical cooking class venue ideas, how to evaluate each option, and a step-by-step event planning timeline with checklists, budget guidance, vendor selection tips, and common mistakes to avoid—so your event runs like a well-organized kitchen.
Start With the Basics: What Your Cooking Class Event Needs
Before touring venues, define your event requirements. Your “must-haves” will narrow your venue list quickly and prevent costly surprises later.
Key event details to confirm first
- Guest count: Total attendees plus instructors, assistants, photographers, and any VIPs.
- Class format: Hands-on (everyone cooks), demo-style (watch and taste), or hybrid.
- Menu complexity: Knife skills, baking, multi-course plating, or quick recipes.
- Dietary needs: Vegetarian, halal, kosher-style, gluten-free, nut-free, alcohol-free.
- Schedule: Arrival, welcome drink, instruction blocks, cooking time, dining, cleanup.
- Branding goals: Corporate messaging, sponsor placement, photo moments, giveaways.
Venue feature checklist (non-negotiables for most cooking classes)
- Ventilation: Commercial hoods or strong airflow to manage smoke and odors.
- Handwashing stations: Safe food handling requires accessible sinks.
- Workstations: Enough counter space per group (ideally 2–4 guests per station).
- Cooking equipment: Burners/ovens that match your menu needs.
- Refrigeration: Cold storage for ingredients and safe holding temps.
- Restrooms: Adequate for guest count; easy to find.
- Accessibility: Step-free entry, elevator access, ADA-compliant restrooms where applicable.
- Insurance requirements: Many venues require event liability coverage.
Cooking Class Venue Ideas (With Pros, Cons, and Best Uses)
1) Dedicated Cooking Schools and Culinary Studios
Best for: Corporate team building, client events, birthday groups, food-focused celebrations.
- Pros: Built-in stations, pro equipment, instructors often available, predictable flow, great lighting.
- Cons: Premium pricing, limited availability on peak dates, catering rules may be restrictive.
- Pro tip: Ask if they offer “private label” classes where you can customize the menu and signage.
2) Restaurant Private Dining Rooms + Kitchen Access
Best for: Hybrid events—hands-on elements plus a hosted meal.
- Pros: High-quality equipment, built-in staff, alcohol service handled, minimal rentals.
- Cons: Many restaurants can’t allow full guest kitchen access (liability); hands-on may be limited.
- Real-world example: A 20-person birthday “pasta night” where guests shape fresh pasta at tables while the chef handles boiling and saucing in the kitchen.
3) Community Centers, Park District Kitchens, and Rec Facilities
Best for: Budget-friendly classes, nonprofits, kids/teen cooking events, cultural cooking nights.
- Pros: Affordable hourly rates, spacious rooms, flexible timing, easy parking.
- Cons: Equipment may be basic; you may need to bring tools, small appliances, or extra refrigeration.
- Pro tip: Schedule a “kitchen test visit” before signing—turn on ovens, check burner output, and verify outlet locations.
4) Event Venues with Prep Kitchens (Lofts, Galleries, Warehouses)
Best for: Stylish, photo-forward events with a chef-led demo or limited hands-on stations.
- Pros: Trendy look, flexible layouts, great for branding and social content, larger capacity.
- Cons: Prep kitchens are not always designed for multiple stations; rentals and staffing can add up.
- Trend watch: “Experiential dining” setups—demo cooking plus interactive plating stations for guests.
5) Co-Working Spaces and Creative Studios with Kitchenettes
Best for: Corporate lunch-and-learns, team socials, simple menus (no heavy cooking).
- Pros: Convenient locations, modern amenities, A/V options for instruction, easy booking.
- Cons: Kitchenettes are rarely suitable for full cooking; best for no-cook or light-cook classes.
- Best class ideas: Sushi rolling, charcuterie boards, mocktail mixing, salad + dressing workshops.
6) Boutique Hotels and Conference Centers
Best for: Corporate retreats, multi-day meetings, out-of-town guest groups.
- Pros: Built-in staffing, strong logistics, parking/valet options, easy add-ons (rooms, AV, meals).
- Cons: Food and beverage minimums; limited flexibility with outside vendors.
- Pro tip: Ask about “chef’s table” spaces or banquet kitchens that can be adapted for a class.
7) Outdoor Venues: Patios, Rooftops, Farms, and Gardens
Best for: Seasonal events, farm-to-table experiences, summer celebrations.
- Pros: Unique atmosphere, natural photo backdrop, great for grills and fresh ingredients.
- Cons: Weather risk, power limitations, permits, insects, temperature control, food safety challenges.
- Smart add-on: A tent + sidewalls + portable handwashing station can turn “risky” into “reliable.”
8) Private Homes (Host Kitchens) and Luxury Rentals
Best for: Intimate gatherings, showers, small corporate VIP events, influencer content.
- Pros: Warm, personal vibe; minimal venue cost if host-owned; flexible timing.
- Cons: Parking and neighbor concerns, limited stations, high wear-and-tear, insurance needs.
- Pro tip: Use “pods” (2–3 guests per station) and choose a menu with staggered oven use to avoid bottlenecks.
How to Evaluate and Choose the Best Cooking Class Venue
Tour questions to ask (bring this list)
- How many workstations can you comfortably set up for hands-on cooking?
- What equipment is included (ovens, burners, mixers, blenders, sheet pans, knives)?
- Is there a commercial hood or strong ventilation? Any restrictions on frying, grilling, or open flame?
- What’s the load-in/load-out process for ingredients and rentals?
- Are there noise restrictions or time limits (especially for evening events)?
- What are the cleaning expectations? Is a cleaning fee included?
- Do you require approved vendors (chef, caterer, bartending, rentals)?
- What’s your policy on alcohol service? Is a licensed bartender required?
- Can you support A/V (mic for chef, screen for overhead camera, music)?
Layout rule of thumb
- Hands-on classes: Plan on 20–30 sq ft per guest including circulation.
- Demo-style: Plan on 12–18 sq ft per guest plus demo table and seating.
Step-by-Step Planning Timeline (With Checklist)
6–8 weeks out: Define scope and lock the venue
- Set event goals (team bonding, celebration, fundraising, lead generation).
- Confirm guest count range and preferred date/time window.
- Create a short list of 5–8 venue options and schedule tours.
- Request quotes with line-item pricing (venue fee, staffing, cleaning, security, AV).
- Sign contract and pay deposit; confirm insurance requirements.
4–6 weeks out: Book your core vendors
- Select chef/instructor and assistants (or confirm venue-provided team).
- Finalize menu and class format (hands-on vs demo vs hybrid).
- Book rentals if needed: extra tables, induction burners, linens, chairs, glassware.
- Arrange beverage plan (BYOB, venue bar package, mocktail station).
- Confirm any permits for outdoor cooking or amplified sound.
2–4 weeks out: Guest communication and logistics
- Send invitations and collect RSVPs; include attire guidance (closed-toe shoes recommended).
- Collect dietary restrictions and allergies (use a simple online form).
- Create a floor plan: stations, handwashing, buffet/tasting area, trash/recycling.
- Plan signage: check-in, station assignments, allergen notes.
- Build a run-of-show schedule and share with venue + chef.
7–10 days out: Final confirmations
- Confirm final headcount and ingredient quantities.
- Review staffing plan (chef, assistants, dishwasher/porter, bartender, coordinator).
- Confirm delivery windows for ingredients and rentals.
- Prepare a contingency plan (extra recipe option, backup indoor space, weather plan).
Event week + event day checklist
- Print station cards, recipes, and timed agenda for instructors.
- Pack an event kit: tape, sharpies, gloves, bandages, wipes, label stickers, trash bags.
- Do a final equipment check: burners, ovens, outlets, lighters, thermometers.
- On arrival: set check-in, music, water station, and clearly label trash/recycling/compost.
- During class: keep transitions tight (prep → cook → plate → eat) and assign clear cleanup roles.
Budget Considerations (Sample Breakdown + Cost Controls)
Cooking class budgets vary widely based on location, instructor, and how “full service” the venue is. Use this sample breakdown to build a realistic event planning budget.
Sample budget ranges (per event)
- Venue rental: $500–$4,000+
- Chef/instructor + assistants: $600–$3,500
- Food ingredients: $15–$45 per guest
- Beverages: $8–$35 per guest
- Rentals (if needed): $200–$2,000
- Event staffing/coordinator: $300–$1,500
- Décor/signage: $100–$800
- Insurance/permits: $100–$500
- Contingency: 8–12% of total budget
Cost-saving strategies that don’t feel “budget”
- Choose a seasonal menu to reduce ingredient costs and improve flavor.
- Use a hybrid format: hands-on for one dish, chef demo for the rest.
- Limit proteins to one featured option and offer a strong vegetarian alternative.
- Skip complex rentals by choosing a venue with built-in stations and included smallwares.
- Replace elaborate décor with functional styling: fresh herbs, citrus, wooden boards, printed recipe cards.
Vendor Selection Tips (Chef, Rentals, Beverage, and Support)
Choosing a chef/instructor
- Ask for a sample class outline and how they manage mixed skill levels.
- Confirm they can accommodate allergies and food safety protocols.
- Request references for similar-size events (especially corporate team building).
- Make sure they provide (or coordinate) assistants—one chef alone can’t manage a 30-person hands-on class smoothly.
Rentals and equipment
- Confirm what the venue provides before ordering anything.
- For limited kitchens, consider induction burners (safer and cleaner than propane indoors).
- Order extra basics: tongs, cutting boards, mixing bowls, sheet trays, and towels.
Beverage service
- Align beverage style with the class: wine pairing, cocktail workshop, or elevated mocktails.
- Check licensing rules—many venues require a licensed bartender and prohibit BYOB.
- Plan hydration: water dispensers and sparkling water reduce bar congestion.
Common Cooking Class Planning Mistakes to Avoid
- Overcrowding the room: Too many guests per station slows the class and creates safety issues.
- Picking a menu that fights the venue: Baking-heavy menus in a space with one oven leads to long waits.
- Underestimating setup and cleanup time: Cooking events need more turnover time than standard parties.
- Forgetting food safety logistics: Labeled allergens, glove use when needed, safe temperatures, and handwashing access.
- Not planning the flow: If guests don’t know where to go next, the energy drops fast.
- Skipping insurance: Protects hosts, venues, and vendors—especially for hands-on cooking and alcohol.
Real-World Venue Match Examples
- Corporate team building (30 guests): Culinary studio with 10 stations, mic for instructor, and a plated dessert add-on for a polished finish.
- Bridal shower (16 guests): Private home or boutique rental with a “spritz + pasta” menu; hybrid format so the chef handles hot steps.
- Fundraiser night (80 guests): Event loft with a chef demo stage, sponsor signage, and tasting stations (demo-style to scale safely).
FAQ: Cooking Class Venue Planning
How far in advance should I book a cooking class venue?
Book 6–10 weeks out for most markets. For peak seasons (holiday parties, spring wedding events), aim for 10–16 weeks—especially if you need a Saturday evening slot.
What’s the ideal group size for a hands-on cooking class?
For smooth pacing, 12–36 guests works well, with 2–4 guests per station. Larger groups are possible, but consider hybrid or demo-style to maintain quality.
Do I need an event planner or day-of coordinator?
If the venue isn’t fully staffed, a coordinator is worth it. They manage timing, vendor arrivals, station assignments, dietary notes, and cleanup—freeing the chef to teach and the host to enjoy.
What permits or insurance might be required?
Common requirements include event liability insurance (often naming the venue as additional insured) and, for outdoor or public spaces, permits for cooking equipment, tents, or amplified sound. Ask the venue for their standard requirements early.
How can I make the event feel elevated without overspending?
Focus on experience upgrades: a welcome mocktail, printed recipe cards, curated playlists, high-quality ingredients, and a clean visual setup. Guests remember how organized and fun the class felt more than expensive décor.
What’s the best format for mixed dietary restrictions?
Choose a base recipe with optional add-ins (proteins, cheeses, sauces) and clearly label station ingredients. This reduces complexity while keeping everyone included.
Actionable Next Steps
- Define your guest count, class format, and menu style in one page.
- Use the venue feature checklist to shortlist 5–8 options.
- Tour spaces with your layout needs in mind (stations, ventilation, handwashing).
- Lock your chef/instructor and confirm staffing ratios.
- Build a run-of-show schedule and finalize your budget with a 10% contingency.
For more step-by-step event planning guides, party organization checklists, and coordination tips, explore the resource library at smartpartyprep.com.
More Articles
 Why Do We Have a 2 Party System? The Real Answer Isn’t What Your High School Textbook Told You — It’s About Rules, Not Voters, and Here’s Exactly How Winner-Take-All Elections, Ballot Access Laws, and Strategic Voting Locked in Duopoly Power for Over 170 Years
Who Goes to the Bachelorette Party? The Unfiltered Guest List Guide That Saves Friendships (and Avoids Awkward Texts)
What to Wear to a Holiday Work Party: The Stress-Free 5-Minute Dress Code Decoder (No More Awkward Outfits or Last-Minute Panic)
How to Throw a US Open Party That Actually Feels Like Flushing Meadows: 7 Stress-Free Steps (No Tennis Skills Required!)
When's the Party's Over Lyrics: The Exact Timing Cue Every Event Planner Needs (Not Just a Song — It’s Your Secret Exit Signal)
Why Do We Have a 2 Party System? The Real Answer Isn’t What Your High School Textbook Told You — It’s About Rules, Not Voters, and Here’s Exactly How Winner-Take-All Elections, Ballot Access Laws, and Strategic Voting Locked in Duopoly Power for Over 170 Years
Who Goes to the Bachelorette Party? The Unfiltered Guest List Guide That Saves Friendships (and Avoids Awkward Texts)
What to Wear to a Holiday Work Party: The Stress-Free 5-Minute Dress Code Decoder (No More Awkward Outfits or Last-Minute Panic)
How to Throw a US Open Party That Actually Feels Like Flushing Meadows: 7 Stress-Free Steps (No Tennis Skills Required!)
When's the Party's Over Lyrics: The Exact Timing Cue Every Event Planner Needs (Not Just a Song — It’s Your Secret Exit Signal)