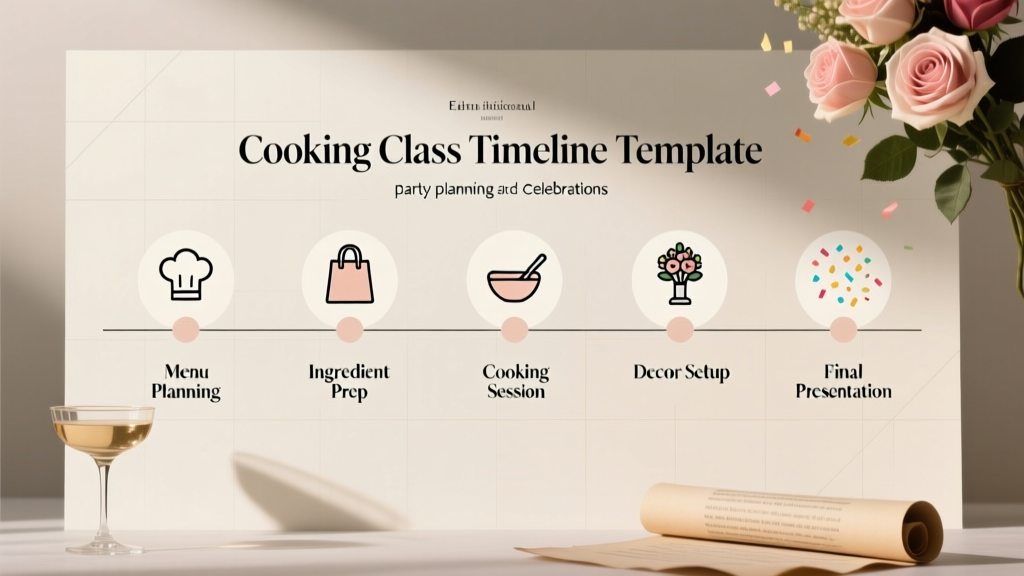
A Cooking Class Timeline Template
A cooking class event can feel effortless for guests—aprons on, music playing, ingredients prepped, and a confident instructor guiding everyone to a beautiful meal. Behind the scenes, though, it takes real event planning and coordination to make that “easy” experience happen. Unlike a typical dinner party, you’re managing food safety, timed recipes, equipment, staffing, and guest flow all at once.
The good news: once you have a repeatable planning timeline template, cooking class events become one of the most rewarding formats to host. They’re interactive (a top event trend), work for corporate team building, birthdays, bachelorettes, and client entertainment, and they naturally create conversation and photo-ready moments. This guide gives you a step-by-step planning timeline, checklists, budget considerations, and real-world examples so you can confidently organize a cooking class from start to finish.
Use this template whether you’re hosting at home, renting a studio kitchen, partnering with a restaurant, or bringing in a chef for an onsite experience.
Define Your Cooking Class Event (Before You Touch the Timeline)
Clear decisions upfront reduce last-minute scrambling and budget creep. Start with these fundamentals:
- Goal: Team building, celebration, client event, fundraiser, or social gathering?
- Guest count: Typical sweet spot is 10–24 for hands-on classes; demos can scale larger.
- Format: Hands-on stations vs. chef demo + tasting, or a hybrid.
- Menu theme: Seasonal, regional (Italian, Thai), dietary-friendly, or skills-based (knife skills, pasta-making).
- Location: Home kitchen, event venue with kitchen, culinary studio, restaurant buyout, or mobile chef setup.
- Length: Common ranges are 90 minutes (demo) to 3 hours (hands-on + dining).
Current Event Planning Trends That Work Especially Well for Cooking Classes
- Interactive guest experiences: Guests want to do, not just watch—offer a small “skill win” (fresh pasta, dumplings, signature cocktail).
- Dietary inclusion: Provide vegetarian or gluten-free options, and label allergens clearly.
- Sustainability: Seasonal menus, composting, minimal single-use plastics, and donation plans for unopened food.
- Micro-moments: Photo-ready plating stations, recipe cards, and a take-home item (spice blend, cookie dough, sauce).
Cooking Class Timeline Template (Step-by-Step Planning)
This event planning timeline template is written for a typical 2–3 hour hands-on cooking class for 12–20 guests. Adjust as needed based on scale and venue rules.
6–8 Weeks Before: Build the Foundation
- Set your date and time window: Consider travel time after work (weekday starts at 6:00–6:30 p.m. often perform best).
- Choose the format and menu concept: Confirm whether guests cook in pairs/teams or individually.
- Create a preliminary budget: Include venue, chef/instructor, food, rentals, staffing, and contingency.
- Shortlist venues or chefs:
- Culinary studios (built-in equipment and staff)
- Restaurants with private rooms and teaching capability
- Private chefs offering mobile classes
- Draft your guest list and invitation plan: Email invite + RSVP form is fastest for tracking dietary needs.
- Check permits/insurance needs: Some venues require event insurance or proof of vendor coverage.
4–6 Weeks Before: Book Vendors and Lock the Menu
- Book the venue and instructor: Confirm access times for setup and breakdown.
- Finalize the menu with timing: Select recipes that can be executed within your class duration.
- Choose 1–2 “hero” recipes (hands-on) plus 1 easy side/salad.
- Avoid long-proof breads or complex multi-step desserts unless prepped in advance.
- Confirm alcohol policy: BYOB, beer/wine only, or hosted bar. Ensure legal compliance and venue rules.
- Plan staffing: For hands-on events, consider:
- 1 instructor/chef per 12–16 guests
- 1 assistant per 10–15 guests (dishwashing, resets, ingredient running)
- Send invitations: Include:
- Start/end time + arrival buffer
- Dress note (closed-toe shoes recommended)
- Dietary/allergy form link
- Location, parking, and accessibility details
3–4 Weeks Before: Logistics, Rentals, and Guest Experience
- Map the room layout: Stations, handwashing access, demo area, dining area, and a clear traffic flow.
- Confirm equipment list: Verify what’s included vs. what you must bring/rent:
- Knives and cutting boards
- Mixing bowls, sheet pans, pots/pans
- Small appliances (mixers, food processors)
- Aprons, towels, sanitizing spray, gloves (if needed)
- Order rentals if necessary: Extra chairs, linens, glassware, portable burners, or plating pieces.
- Plan the “event flow”: Decide where guests check in, wash hands, store coats/bags, and get their station assignment.
- Design printed materials:
- Recipe cards (easy-to-read, with substitutions)
- Station labels and allergy notices
- Welcome sign and schedule
2 Weeks Before: Food Orders, Dietary Needs, and Timeline Rehearsal
- Close RSVPs (or start follow-ups): Confirm final headcount and any special accommodations.
- Finalize your ingredient list: Build it by recipe and multiply by stations.
- Plan mise en place (prep strategy):
- Pre-measure spices and dry goods
- Wash and portion produce
- Label everything by station and step number
- Confirm vendor schedules: Chef arrival, assistant arrival, rental drop-off/pickup.
- Run a timing rehearsal: Even a quick “tabletop run” reduces surprises. Identify:
- When ovens and burners must be preheated
- Which steps create bottlenecks (one sink, one mixer)
- When cleanup/reset must happen
72–48 Hours Before: Final Confirmations and Shopping
- Send guest reminder: Address, parking, start time, what to wear, and allergy reminder.
- Shop for ingredients: Prioritize freshness and food safety:
- Buy proteins and delicate produce closest to event day
- Check refrigeration capacity
- Build a cooler plan for transport
- Print and pack: Recipe cards, labels, pens, tape, extra utensils, first-aid kit.
- Prepare beverage plan: Water station, non-alcoholic options, and glassware count.
Event Day: Hour-by-Hour Cooking Class Run of Show
Use this as a plug-and-play event coordination schedule for a 6:30–9:15 p.m. class (adjust times as needed):
- 3:30–4:30 p.m. (2–3 hours before): Venue access, rentals arrive, setup stations, signage, handwashing guidance.
- 4:30–5:30 p.m.: Ingredient staging (mise en place), label station bins, test equipment, preheat ovens if appropriate.
- 5:30–6:00 p.m.: Staff meal/briefing, safety review, confirm timeline, assign roles (check-in, dish/reset, photography).
- 6:00–6:30 p.m.: Guest arrival window, check-in, name tags, welcome drink, station assignments.
- 6:30–6:40 p.m.: Welcome + overview: menu, timing, safety (knives, hot surfaces), allergy reminders.
- 6:40–7:40 p.m.: Hands-on cooking block #1 (prep + main technique). Assistants circulate to keep pace.
- 7:40–8:05 p.m.: Cooking block #2 (finish + plating practice). Begin light reset/cleanup as dishes finish.
- 8:05–8:35 p.m.: Group dining/tasting + instructor Q&A. Capture photos of finished dishes.
- 8:35���8:50 p.m.: Dessert/coffee or final tasting bite. Share recipe cards, take-home items, and thank-yous.
- 8:50–9:15 p.m.: Final cleanup, leftovers packing plan, rentals staged for pickup.
Post-Event (Next Day to 1 Week): Wrap-Up Like a Pro
- Send a thank-you message: Include recipes, photo link, and any partner shout-outs.
- Close out vendor payments and tips: Record actual spending for future budgeting.
- Debrief notes: What ran long, what guests loved, what to prep earlier next time.
- Collect feedback: Short survey: favorite dish, pacing, difficulty level, dietary satisfaction.
Cooking Class Planning Checklist (Quick Copy/Paste)
- Date/time confirmed
- Venue booked + access times confirmed
- Instructor/chef contracted + assistant staffing confirmed
- Menu selected with dietary alternatives
- RSVP system set up with allergy question
- Floor plan/station assignments created
- Equipment inventory completed (what’s included vs. bring/rent)
- Ingredient list finalized and shopping schedule set
- Mise en place plan created (portioning, labeling, bins)
- Beverage plan (water, NA options, alcohol policy)
- Printed materials (recipe cards, signage, labels)
- Food safety supplies (sanitizer, gloves if needed, thermometer, first aid)
- Music playlist and lighting plan
- Photography plan (host, staff member, or tripod station)
- Cleanup plan + trash/compost/recycling plan
- Leftovers plan (containers, donation rules)
Budget Considerations (With Sample Breakdown)
A cooking class budget typically lands in the mid-to-premium range because it combines catering, entertainment, and supplies. Costs vary widely by city, venue type, and menu complexity.
Sample Budget: 16 Guests, 2.5-Hour Hands-On Class
- Venue rental: $400–$1,200
- Chef/instructor fee: $600–$1,500
- Assistant staff: $150–$400
- Food + ingredients: $18–$45 per person ($288–$720)
- Beverages: $80–$300 (water/NA) or $200–$700 (beer/wine hosted)
- Rentals/supplies: $75–$350 (aprons, extra tools, disposables, take-home containers)
- Decor/signage: $30–$150
- Gratuities: 10%–20% depending on vendor policy
- Contingency: 8%–12% (last-minute ingredient replacements, extra ice, broken glass)
Practical budgeting tip: Decide early whether you want a premium menu (steak/seafood) or a value-smart menu (seasonal vegetables, chicken, pasta). Menu choice is one of the fastest ways to control costs without sacrificing guest experience.
Vendor Selection Tips (Venue, Chef, Rentals)
How to Choose the Right Venue
- Capacity and layout: Confirm how many can cook at once (not just stand in the room).
- Equipment included: Ask for a detailed kitchen inventory list.
- Rules and restrictions: Alcohol policy, noise limits, open flame rules, cleaning requirements.
- Accessibility: Parking, elevator access, restrooms, and mobility-friendly workstation options.
Questions to Ask a Chef/Instructor
- Have you taught groups of this size before?
- What do you need from the venue (ovens, burners, refrigeration)?
- How do you handle allergies and cross-contact prevention?
- Will you provide assistants, or should the host hire support?
- What’s your pacing plan if one station falls behind?
Smart Rental and Supply Strategy
- Rent only what you can’t borrow or source from the venue.
- Standardize stations: identical tool sets reduce confusion and delays.
- Use labeled bins per station (Trend: “kit-of-parts” organization for faster setup and teardown).
Real-World Examples (How the Template Adapts)
Example 1: Corporate Team Building Cooking Class (24 Guests)
- Best format: Team stations + friendly competition (best plating, best teamwork).
- Menu choice: Tacos + salsa bar (fast, customizable, allergen-friendly).
- Planning tweak: Add a 10-minute “icebreaker” and a structured awards moment.
- Coordination tip: Use color-coded station assignments to speed up check-in.
Example 2: Birthday Cooking Party at Home (12 Guests)
- Best format: Hybrid—chef demo for tricky steps + hands-on for fun steps.
- Menu choice: Fresh pasta with two sauces + simple salad.
- Planning tweak: Build a “dishwashing relay” plan (or hire a helper) to keep the kitchen functional.
- Coordination tip: Set up a self-serve beverage station away from the prep area to reduce congestion.
Common Cooking Class Planning Mistakes to Avoid
- Underestimating prep time: Mise en place is the event. Portion and label early to protect the schedule.
- Choosing an overly ambitious menu: If guests are beginners, keep techniques simple and wins frequent.
- Not collecting dietary needs early: Last-minute substitutions can impact timing and cross-contact risk.
- Too few tools per station: One whisk or one chef’s knife per station slows everything down.
- Skipping a cleaning/reset plan: Dirty stations kill momentum and can create safety issues.
- No buffer time: Add 10–15 minutes of “flex” into your run of show for late arrivals and oven timing.
FAQ: Cooking Class Event Planning
How long should a cooking class event be?
For hands-on cooking classes, 2 to 3 hours is the sweet spot. It allows time for welcome, instruction, cooking, dining/tasting, and light cleanup without feeling rushed.
How many guests can I host for a hands-on cooking class?
At-home kitchens often work best with 8–14 guests depending on counter space and equipment. Culinary studios can handle 16–40+ depending on the number of stations. The key metric is how many people can cook simultaneously without crowding.
What’s the easiest menu for a mixed-skill group?
Build-your-own formats work well: tacos, pizza, pasta with prepped components, dumplings with pre-made fillings, or a seasonal bowl concept. These are flexible for dietary needs and keep the event fun.
Do I need event insurance for a cooking class?
Some venues require it, especially for corporate events or alcohol service. Check the venue contract and ask your chef/vendor for proof of insurance. For private homes, consider a one-day event policy if you want extra peace of mind.
Should I offer alcohol at a cooking class?
Optional, but popular. Keep it simple: beer/wine or a signature cocktail, plus strong non-alcoholic options. Assign someone to monitor pacing, and ensure the venue allows service.
How do I keep the class on schedule?
Use station kits (pre-portioned ingredients + labeled tools), set a visible timer, and have an assistant dedicated to resets and dish flow. Also choose recipes with predictable cook times.
Next Steps: Use This Template to Plan with Confidence
Start by choosing your format (hands-on vs. demo), locking a realistic menu, and booking the right venue and chef. Then plug your details into the timeline above, paying special attention to mise en place, station setup, and a clear run of show. With the right event planning checklist and a smart coordination plan, your cooking class becomes a memorable, smooth-running experience that guests will talk about long after the last bite.
Ready to plan your next event? Explore more practical event planning guides, party organization checklists, and coordination templates on smartpartyprep.com.
More Articles
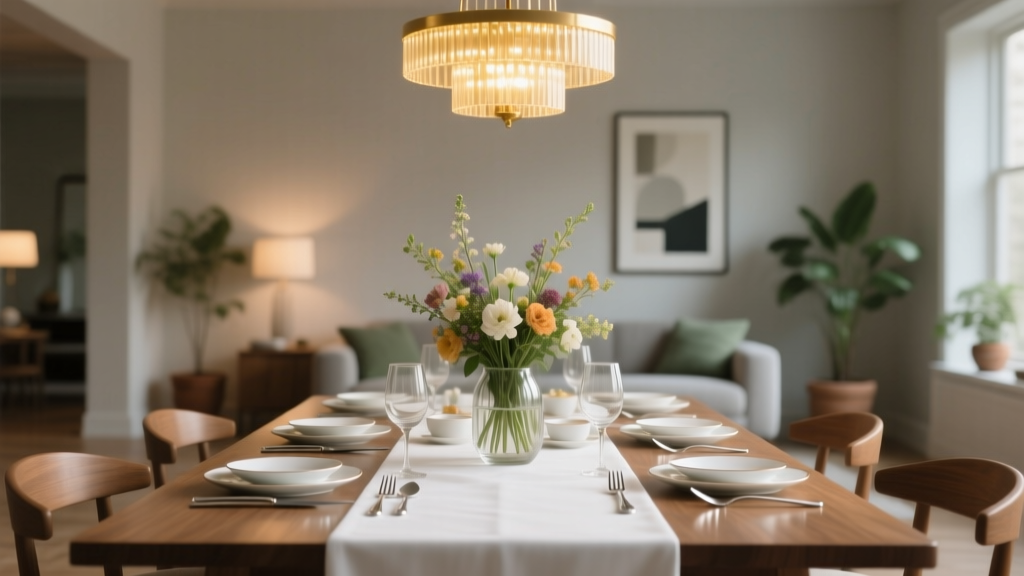 How to Plan a Dinner Party Like a Pro
 Budget Tips for a Team Building Event
Is Bloom Third Party Tested? We Investigated 7 Lab Reports, Certifications, and Customer Complaints to Answer the Question You’re Too Busy to Research Before Booking Your Wedding or Corporate Event
Did Diary of a Wimpy Kid Party Pooper Come Out? The Truth About Release Dates, Where to Buy Right Now, and How to Pull Off the Perfect Greg Heffley-Themed Bash Without Last-Minute Panic
Budget Tips for a Team Building Event
Is Bloom Third Party Tested? We Investigated 7 Lab Reports, Certifications, and Customer Complaints to Answer the Question You’re Too Busy to Research Before Booking Your Wedding or Corporate Event
Did Diary of a Wimpy Kid Party Pooper Come Out? The Truth About Release Dates, Where to Buy Right Now, and How to Pull Off the Perfect Greg Heffley-Themed Bash Without Last-Minute Panic
 What Is Responsible Party on Medical Form? The Critical Role You’re Overlooking (and How One Wrong Entry Can Delay Care, Trigger Billing Errors, or Void Insurance Coverage)
How to Keep Rice Warm at a Party Without Drying It Out, Burning It, or Wasting Energy: 7 Field-Tested Methods (Including the $12 Hack Chefs Swear By)
Is USA a two party system? The truth behind voter frustration: Why third parties keep failing, how ranked-choice voting changes everything, and what real electoral reform would actually require — not just textbook myths.
When to Do Gender Reveal Party: The 12-Week Rule Most Parents Ignore (and Why Timing Affects Safety, Guest Attendance & Stress Levels)
Why Were Party Leaders Shocked by Khrushchev's Rejection of Stalin? The 1956 Secret Speech That Shattered Soviet Orthodoxy — What Every History Student & Educator Needs to Understand About Power, Fear, and Sudden Ideological Reckoning
How to Make a Party Private in Fortnite: The 5-Step Fix That Stops Crashers, Blocks Strangers, and Keeps Your Squad Safe (2024 Verified)
What Is Responsible Party on Medical Form? The Critical Role You’re Overlooking (and How One Wrong Entry Can Delay Care, Trigger Billing Errors, or Void Insurance Coverage)
How to Keep Rice Warm at a Party Without Drying It Out, Burning It, or Wasting Energy: 7 Field-Tested Methods (Including the $12 Hack Chefs Swear By)
Is USA a two party system? The truth behind voter frustration: Why third parties keep failing, how ranked-choice voting changes everything, and what real electoral reform would actually require — not just textbook myths.
When to Do Gender Reveal Party: The 12-Week Rule Most Parents Ignore (and Why Timing Affects Safety, Guest Attendance & Stress Levels)
Why Were Party Leaders Shocked by Khrushchev's Rejection of Stalin? The 1956 Secret Speech That Shattered Soviet Orthodoxy — What Every History Student & Educator Needs to Understand About Power, Fear, and Sudden Ideological Reckoning
How to Make a Party Private in Fortnite: The 5-Step Fix That Stops Crashers, Blocks Strangers, and Keeps Your Squad Safe (2024 Verified)